
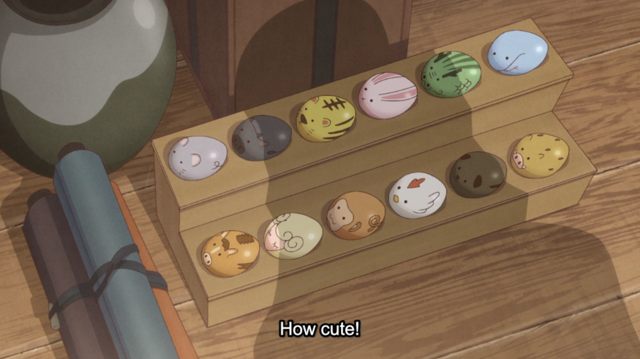
Fruits Basket recently started airing! As I was watching, I thought the little zodiac figurines would make for great daifuku, so that’s what I decided to do this week. Daifuku, if ya didn’t know, are little balls of mochi normally filled with fruit, red bean paste, or some other kind of filling.
I’ve made daifuku before, with pumpkin spice for the holiday season, but I thought I could rework the existing recipe to be equally delicious, while still looking really cute. I needed to essentially make twelve flavors for the twelve different zodiac animals. I could either flavor the ganache, or flavor the mochi itself, but in the end I decided to flavor the mochi, to achieve the color gradation I was really looking for. You can also flavor the ganache, but it won’t show up as strongly through the mochi, so you won’t get the nice coloring.
I had a few options for the colors as well—food dye, or all natural. I felt that, especially for some of the more vivid colors, natural colorants would lend me a nice color while also tasting good. The colorants are all natural (with the exception of the food dye for the tiger), so if you’re worried about eating a ton of crazy dyes. Of course, all of that is completely ruined when you draw on the little faces, because you need a food safe food dye pen. But hey, at least you tried!
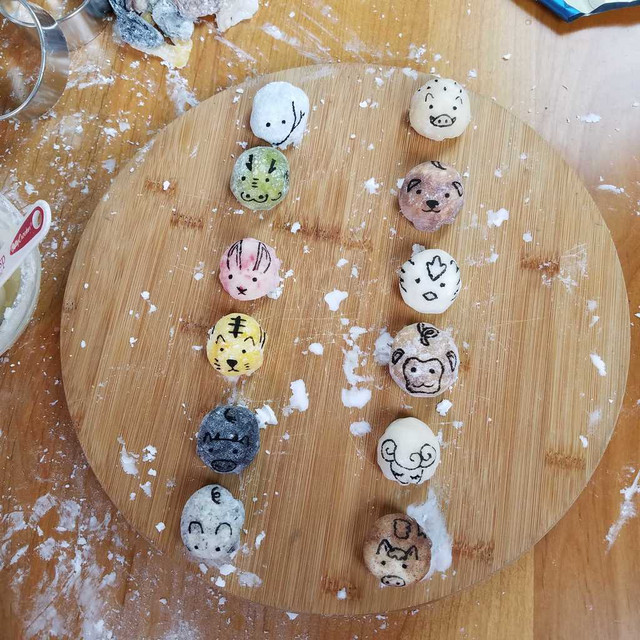
In the end, these little mochis were too cute—almost too cute to eat. That didn’t stop us, though. They were gone within the day!
Watch the video below for step-by-step instructions!
Ingredients for Zodiac Mochi
- 4 oz chocolate chips
- 4 tbsp hot cream
- 3/4 cup shirotamako
- 1/2 cup water
- 3/4 cup sugar
- Activated Charcoal (Ox)
- Freeze dried pineapple + golden food dye (Tiger)
- Ground black sesame (Rat)
- Matcha powder (Dragon)
- Freeze dried ground strawberry (Bunny)
- Pea Flower extract (Snake)
- Cinnamon (Horse)
- Vanilla (Ram)
- Brown Sugar (Boar)
- Espresso Powder (Monkey)
- Cocoa powder (Dog)
- (The rooster is just plain mochi)
- Potato Starch
- Food safe food dye marker
To Make Zodiac Mochi
1. Begin with the ganache. Heat the cream in the microwave, and pour over chocolate. Let sit a few minutes, and then stir through. Heat in the microwave on ten second bursts, or until the whole mixture stirs through and is nice and ribbony. Set aside to cool.
2. Add shiratamako and water to a plastic bowl. Stir until no lumps remain (it’ll be kinda one big lump). Add sugar and stir through until soupy. Cover with plastic wrap, and microwave at 1000 watts for 1 minute. Remove plastic, stir through, and microwave again for the same amount of time and at the same power level. Remove plastic, stir through. It should be nice and sticky and slightly transparent.
3. Prepare colorants. Portion mochi into twelve pieces (set one plain white one aside for the rooster). Wet your spatula with water to help prevent too much sticking.
4. Add colorants to the eleven different mochi bowls you’ve prepared. Mix through- it will be difficult, but with a little elbow grease, it’ll come together.
5. Set colored mochi aside to wait on a plate sprinkled with potato starch, to prevent mochi from sticking. Roll each one out individually on a surface dusted with potato starch. Cut each color into a circle, and fill with a half a teaspoon of ganache.
6. Close mochi by pinching the edges together, and then twisting until mochi becomes round. Use the sides of your hands to help form it into the right shape.
7. Use food-safe marker to paint the faces on each little zodiac mochi.
8. Enjoy!
I hope you enjoyed this post! Check in next week for another recipe, and to check out more anime food recipes, visit my blog. If you have any questions or comments, leave them below! I recently got a Twitter, so you can follow me at @yumpenguinsnack if you would like, and DEFINITELY feel free to send me food requests! My Tumblr is yumpenguinsnacks.tumblr.com. Find me on Youtube for more video tutorials! Enjoy the food, and if you decide to recreate this dish, show me pics! 😀
